Pages

 photo Home2_zps584dacc9.jpg  photo AboutMe_zps9f51f715.jpg  photo Discla_zps31000308.jpg
Showing posts with label Tutorial. Show all posts

Friday, 14 November 2014

Black + Gold Sugar Skull


Hello Lovelies,

Halloween is one of my favourite times of the year, I swear I've become obsessed with looking and watching videos of everyone's looks, everyone gets so creative. It just happened to be exam time for me the entirety of October, so yay! All I wanted to do while I was studying was to transform myself into something creepy or different, so I personally used that as fuel to study extra hard. When I finally got around to sitting down and trying something out, the only idea I had in my head was a sugar skull and I thought a black and gold colour scheme would work well, so I just winged it.

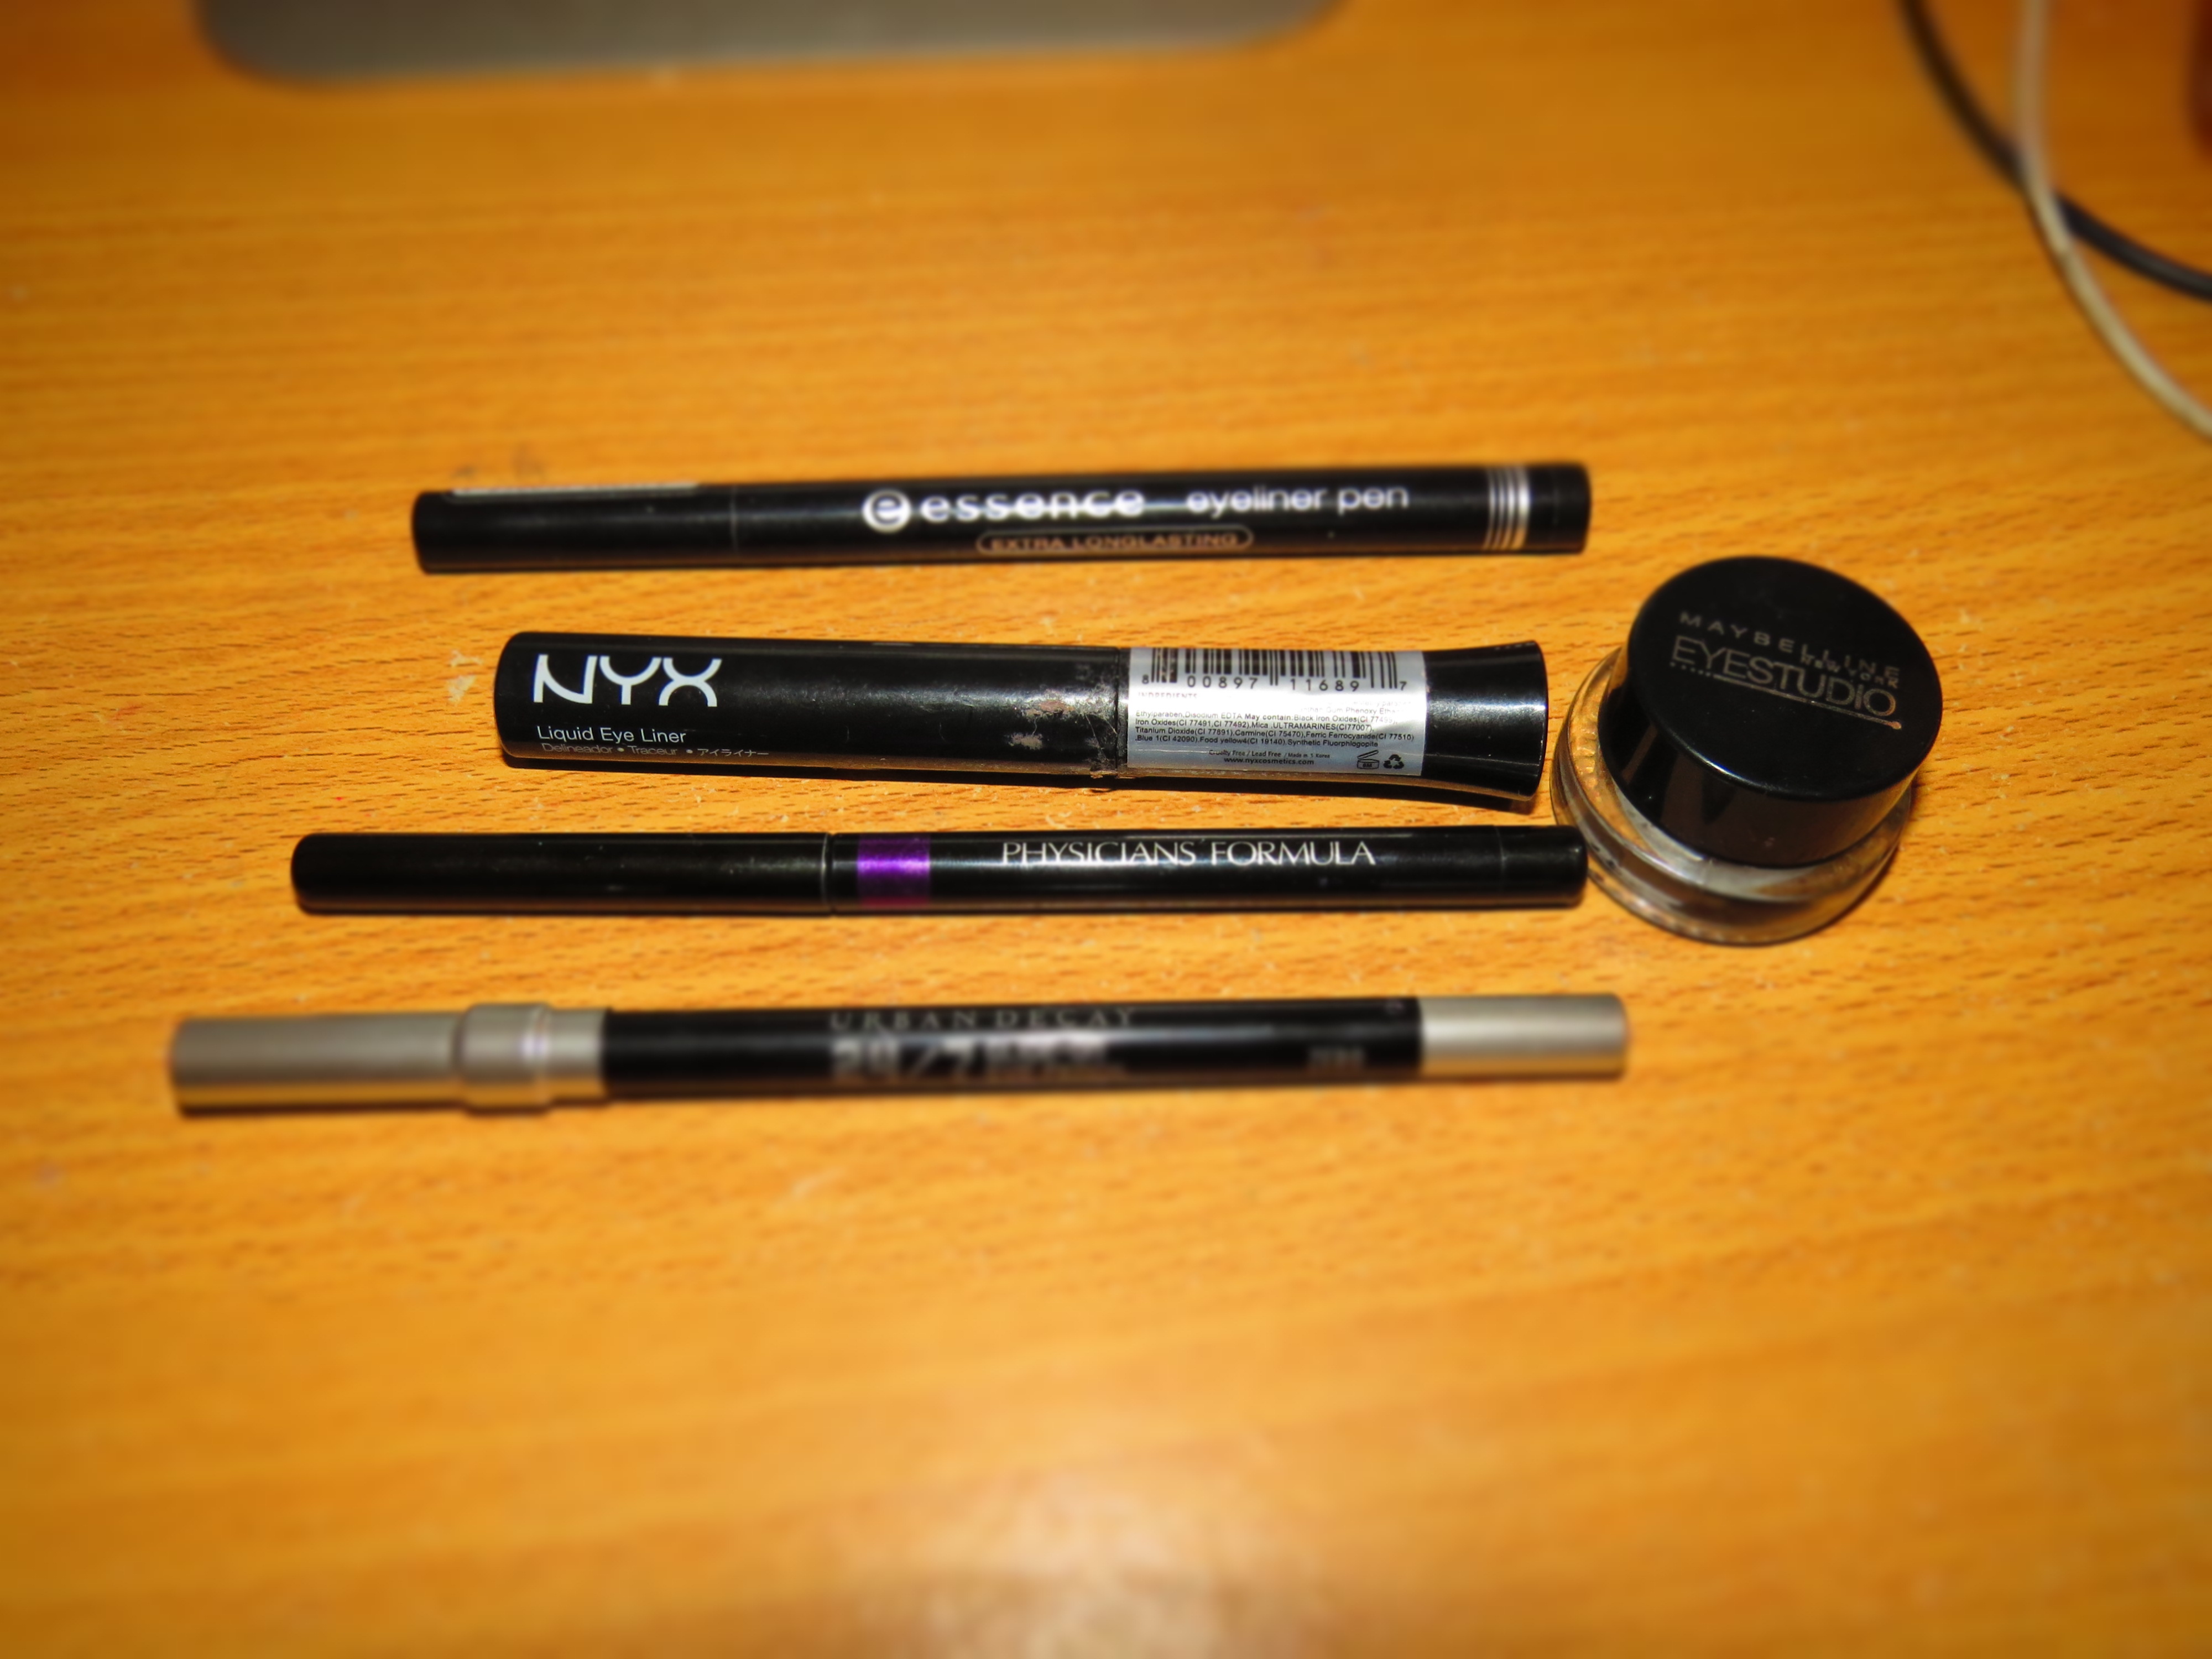
I started by contouring (very lightly) with black eyeshadow around my jawline and the sides of my face. The eyes were very fun to create and I started by placing down different yellows and golds to create an opaque colour around the eyes. Then came the black outline and the blending, which in all honesty took me the longest, but the trick i found was to keep applying gold/yellow where needed and placing some black lightly over those areas where you've placed more gold. Filling in the half circles around the eyes are pretty simple until you get to the ones around the nose, they can get a little tricky so take your time. I just used a pencil eyeliner, so if you use gel or liquid you'll have to be extra careful since they'll smudge easier.


Personally I found the nose tricky since the area is all curved, I spent way too long trying to clean up the edges but in the end I sort of just left it the way it was. Lastly you can really improvise with the mouth, I've seen so many interpretations, I tried to keep it simple.

Of course I put a deep face in !!!!


Hope you all had a wonderful Halloween!!!!


xoxo

Thursday, 23 January 2014

Gold Neutral Eye + Pink Lips Ft. Naked Palette


Hello Lovelies,

I've been wanting to film a video FOTD for a while now and well I finally did it, and boy was it a pain to edit but here it is. This is just a simple look and I find myself using this look on the regular.

PRODUCTS USED:
Garnier Perflect Blur Primer
Garnier BB Cream in Light
MAC Pro Longwear Concealer in NC20
Rimmel Silky Loose Powder in Translucent
Essence Sun Club Bronzer
Benefit 10 Bronzer
MaxFactor Flawless Perfection Blush in 220 Classic Rose
Elizabeth Arden Shimmer Powder in Nude Shimmer
MAC Paint Pot in Rubenesque
Urban Decay Naked Palette Shades in Naked, Half Baked, Virgin, Buck and Creep
MAC Paint Pot in Let's Skate
Maybelline One by One Mascara
Maybelline Color Whisper in 65 Pink Possibilities

What'd you think of the video? Any recommendations?
xoxo

Saturday, 23 November 2013

How To: Groom/Tidy Your Eyebrows

Some may say I'm blessed with a nice set of full brows, but there is one major downside to this blessing, and that is they require a very strict routine to keep them in line. I went onto the internet and watched many tutorials in the beginning and how glad was I! After only a few I heard of a million horror stories of over plucking and getting them waxed into weird shapes. So I've combined a handful of techniques and tricks I found and I've heard shared around my girlfriends and I hope this tutorial will be a decent guide for anyone who is new to grooming their eyebrows. This is how I personally do them and I think this a pretty decent way to ensure that you don't over pluck and that you stay within the natural curve of your eyebrows.

What you'll need:
  • A pair of decent tweezers
  • Nail scissors (preferably the curved ones, they work best!)
  • Spooly Brush (the one shaped like a christmas tree)
  • A white eyeliner (Optional)
  • and of course.....a pair of unruly eyebrows.
 So here are my untouched eyebrows and since I've been so busy the last two weeks, they've been left to go unruly, which is kinda perfect for tutorial purposes.
Taking the spooly brush give your eyebrows a quick brush through and then push the eyebrow hairs upwards to see if they need to be trimmed. As you can see in the image above I had a substantial amount of hair to trim, since mine tend to grow long as well.
With those hair pushed up take the nail scissors and trim the hairs to the natural height of your eyebrow. The key with eyebrows is to keep them as close to their natural state as possible and just tidy.
If you're new to doing your eyebrows then using a white eyeliner is a good idea. The trick to it is to trace around the bulk/natural area of your eyebrow and go from there. By tracing with the eyeliner is shows clearly what hairs need to be removed and gives simple direction for when you start plucking.
Once you've traced around, take your tweezers and focus on a single hair that you want to remove. You may need to get super close to your mirror or use a compact mirror. Place the open tweezers at the base of the hair then clamp and pull. If the pain is too much you could ice the area before hand to numb the skin. Also if it's your first time, the sensation might be a bit surprising but it does get less intense the more times you've done it. Now just pluck the stray hairs that are covered by the eyeliner and that are outside it.
The area around your eyebrow may be a tad red and sore after but that fades soon after and is perfectly normal. All done!

How helpful did you find this tutorial? If you're more experience, how do you do your
eyebrows? I would love to hear your comments :)


Friday, 18 October 2013

Snow White Makeup Look and Costume/Tutorial - #Bloggoween


This is my last one I swear (unless I get really creative in the next couple of weeks!) and this is my favourite and my personal pick for Halloween this year. I've always been in love with the Disney Princesses and although Snow White wasn't my all time favourite, I am still quite fond of her and really wanted to try out a classic Disney look for this year's Halloween.


I bought the costume off eBay and it was quite cheap but not the worst quality available. You can get full length gowns off the internet but I already knew the type of Halloween party I was heading too and if I wore a full length gown my embarrassment would be akin to Cady's in Mean Girls!

So you wanna know how to do it?
  1. Full coverage foundation routine, including liquid or creme foundation, concealer, powder. Snow White has a flawless complexion and full coverage is one way to recreate her porcelain skin.
  2. Since Snow White has black hair I filled in my brows with black and it made a huge difference to the look.
  3. Take a lighter toned bronzer and put it around the hallows of your cheeks and temples. Then take a darker bronzer or contour powder and go over the other parts as well as the sides of the nose and the jaw line.
  4. Lightly highlight under the eyes, down the nose and on the chin.
  5. With a light pink blush place it on the apples of your cheeks and concentrate it quite heavily but try an avoid too round of a circle.
  6. Lightly line the upper lash line with a black eyeshadow or eyeliner. Apply mascara and white eyeliner to the waterline
  7. For the lips, moisturize with a lip balm then line the lips with a red lip liner. Apply red lipstick. If you make any mistakes take your concealer and define your lips.
  8. DONE!
The faux bob isn't too difficult to achieve and there are heaps of tutorials around the internet to help with that!

So what are you doing for Halloween? If you want to know any specific products just ask in the comments or on Twitter. Feel free to leave a comment or share!

Doe/Bambi Inspired Makeup Look/Tutorial - #Bloggoween

 (with flash)
(with natural lighting)

This is by far one of my favourites that's I've tried out for Halloween this year. I'd never done anything like this before but had seen a few people giving it a go and thought I'd give it a a try. This was my first attempt and I really like it, other than the white dots could've been a little more prominent. It wasn't as tricky as it looks and was really simple, it's mostly just contouring and eyeliner.
So you wanna know how to do it?
  1. Do a normal foundation or BB cream routine.
  2. Fill in brows
  3. Contouring Concentrate the bronzer on the apples of your cheeks and your temples and work around in a C shape. Also place the bronzer down the sides of the nose to create the appearance of a thinner nose. Pack on a highlighter under the eyes and down the nose.
  4. Eyeliner Do a simple winged eyeliner then place three small dots underneath the wing, repeat this on the inner corner down the nose. Draw on a small animal nose and connect it to your lips and put eyeliner on the top lip. Grab a white eyeliner and place small dots around the bronze areas.
  5. Eye Makeup I kept everything simple and used a matte brown in the crease and a white eyeliner on the waterline. Mascara of course!
  6. DONE!
You can obviously do more with this look but if you're looking for a simple Halloween look, this will definitely do the trick.

So what are you doing for Halloween? Feel free to leave a comment or share!

Pop Art Inspired Makeup Look/Tutorial - #Bloggoween

 (Natural Lighting)

(With Flash)
Now don't freak out, I did not cut my hair off, I was still wearing my hair in a bob from doing the Snow White makeup, which will go up in a post shortly after this one. Bloggoween is finally here and I know I might be a little in posting but because of time zones I think now is a pretty appropriate time to post the three looks I've prepared. 

This is my first look, a pop art inspired one. I opted out of doing a full face of dots and went for something a little simpler. I have to admit I didn't do the best job I could've done, but unfortunately I was using one of my lesser quality eyeliners when I was doing this look and it started loosing pigmentation and I didn't want to start again so I settled for this final result, as I think it gives the general idea and my personal interpretation of the popular look that's going around.

So you wanna know how I did it?
Started off with my normal foundation routine and very simple contouring which I will mention more with the Snow White look since it's more important for that makeup look. 
I filled in my brows with black and personally I think this will look much better on someone with brows that are less thick, but I'm not complaining.
Red lips are semi iconic for this style and I stayed with the tradition.
Now for the eyeliner! I liner around my lips then upper lash line, bridge of nose, around my nose, above my brows and in the hallows of my cheeks. You can totally add your own expression lines, it depends on what expression you want to convey, I went for mopey and sad. Then I marked the outline of the tears and filled them with a light blue eyeliner.

There's nothing too complicated about this look and it's very easy to make your own,  I love seeing other people's interpretations!

So what are you doing for Halloween? Feel free to leave a comment or share!
 

Friday, 13 September 2013

DIY Tinted Moisturizer - #SBBC

DIY Tinted MoisturizerThis is fairly self-explanatory, I sincerely couldn't think of anything DIY Beauty other than my brush cleaning method which is featured here, an then I thought about my own way of making tinted moisturizer, since I don't own any. I would definitely recommend not using a really heavy moisturizer because it might make your skin really shiny and unless you're normal to dry skin, that's a real problem. You really don't need to use very much foundation at all. In regards to actually mixing the two products, i normally put both on the back of my hand then combine together with a foundation brush of some sort.

I'm fairly new at making little graphics like this and I want to know your opinion. What do you think of them and do you prefer them to me posting photographs?

Thursday, 12 September 2013

A Beginner's Guide to Eyeliner- #SBBC

IMG_0361 When it comes to eyeliners there are so many options, and when I was a real beginner, I was so confused, they all seemed to do the same thing, just all differently. So why not take advantage of today's SBBC topic which is a comparison and compile a little beginner's guide to set them all out, as well as some pointers and some pros and cons.

  1. Pencil Eyeliner (Urban Decay 24/7 Glide-on Eye Pencil in Zero Pictured) - Pencil eyeliners are brilliant to work with and I particularly love this one since it applies perfectly and gives the blackest black payoff. The are great to use for smokey eye looks, for example you can line your upper lash line then smudge with either a brush or your finger and voila, a smokey eye. I find it near impossible to create a wing with pencil eyeliners, especially with this one since it has a very creamy consistency.

  2. Crayon Eyeliner (Physician's Formula Black Eyeliner for Brown Eyes Pictured) - I cannot stress how amazing crayon eyeliners are. When I was starting out sometimes I didn't like the occasional harshness that I got with a pencil eyeliner and invested in a MAC crayon eyeliner and fell in love. They are so easy to apply and clearly don't need to be sharpened. I really like using crayon eyeliners for the upper lash line but I would have to emphasize how great the work on the waterline and lower lash line. I would say the only con is that again, it is hard to create a wing with crayon eyeliners.

  3. Felt Tip or Pen Eyeliner (Essence Eyeliner Pen Pictured) - Okay guys, let me calm down, I own wayyyy too many eyeliner pens. Once I discovered the amazingness which is the eyeliner pen, I kinda lost my shit. When I was starting out with makeup, I was having such a problem with lining my upper lash line and trying to learn how to do a wing (I'm aware I'm not the only person who had this learning curve.) These were my saviour! I find that I get a hell more stability with an eyeliner pen since I can hold it closer to the end whereas I can't do that with liquid eyeliner. My tip is to try and get an idea of how thick the pen is and also the density, because some pens can be extremely thin and flexible whereas some are stiff and thick.

  4. Liquid Eyeliner (NYX Liquid Eye Liner in 01 Black Pictured) - I've never had a good experience with liquid eyeliner, but I still wanted to try it out. I know that eventually with practice I will be able to get the hang of it but i really like the stability that I get with eyeliner pens. I would say the pro of liquid eyeliner is that the payoff and precision (if you can do it!) is absolutely spectacular and looks super duper professional. A con is probably that it is difficult to learn that there isn't any room to smudge and create a smokey eye.

  5. Last but not least, Gel Eyeliner (Maybelline Eye Studio Gel Eyeliner in Blackest Black Pictured) - Gel eyeliners are amazing, beginners listen up! The application process is so flippin' simple, I was blown away. This product in particular comes with a brush, that I personally don't like but I have friends who do like it. I do recommend an angled brush for better precision. It is so easy to build gel liner and creating a nice little wing doesn't become a complete stress meltdown.


I hope that was a decent introduction to the wonderful world to eyeliner, my one big tip is to practice. I mean I still kinda suck at eyeliner but compared to a year or even a few months ago, I've improved heaps, just from practice and getting comfortable with what sort you like best. What's you're favourtie type of eyeliner? What ones do you want to try out?

Friday, 26 July 2013

How To: Clean Your Makeup Brushes

One of the most important parts of up-keeping a makeup and skincare routine is definitely cleaning your makeup brushes. They hold incredible amounts of dirt and old makeup in them and remember that time you got the flu well so does your makeup brushes, which is why it is so important to take care of, and clean your brushes. Now I am definitely not saying that you have to rush out and purchase the most expensive brush cleanser on the market, you can do this very inexpensively, just like I have.

What You'll Need:

IMG_0006

  • Dirty Makeup Brushes (of course)

  • Baby Shampoo (or alternatively you can use a combination of olive oil and dish-washing detergent) I'm using Johnson's No More Tears Baby Shampoo which I picked up for $4.55

  • Paper Towel or a Hand Towel ( I find paper towel more convenient)

  • A small bowl